Freeware, Shareware, and Cheap Mac Software for Filmmakers

It's been a long time since we've done a post that wasn't related to Something, Anything. Back in 2007 (!), I did a post on shareware for filmmakers. That's still the first hit you get if you google the term. So I figured it was time to do an update. Looking over this list, it's kind of remarkable what kind of tools you can assemble for very, very little money.

UPDATED AGAIN: May 2023. It’s amazing that this post was originally written in 2007 and so many of these apps are still relevant in 2023.

Happy New Year!

AUDIO/VIDEO EDITORS

Audacity: Free. From the audacity website: "Easy-to-use, multi-track audio editor and recorder for Windows, Mac OS X, GNU/Linux and other operating systems."

Audio Hijack: $64. Allows you to record any streaming audio. Useful for all sorts of things -- skype interviews, etc. Also, you may want to compare Fission (Rogue Amoeba’s $35 audio editor) against Audacity.

Unknown

Unknown

DaVinci Resolve 18: Free and Paid versions. Resolve would be on this list alone because it’s an industry-standard color grading app. What’s equally amazing is that it’s now a very capable NLE and audio editor (with Fairlight). When Apple introduced Final Cut Pro X and abandoned its venerable (but aging) Final Cut Pro 7, there was a seismic shift in the NLE landscape. Some people moved to Premiere Pro, others moved to Avid, and some adopted FCPX. I clung to FCP 7 in hopes that something would come along that was less buggy (and better supported) than Premiere, more intuitive than Avid, and more "traditional" (for lack of a better word) than FCP X. Though I’m still locked into Premiere Pro because that’s what’s used by most of my collaborators, DaVinci Resolve feels like the best of these today, and the free version does 90% of what the paid version does. And of course, it's a must have for the grading tools alone.

VIDEO CONVERTERS

Apple Compressor: $50. Apple’s venerable Compressor app (part of its old Final Cut Studio suite) got a make-over when FCP X was introduced a few years ago. Now an affordable standalone app, it’s $50 and works pretty well. Users of Adobe Creative Cloud (which includes Adobe Media Encoder) probably don’t have a use for this, but some people still prefer it. VLC, Handbrake, and MPEG Streamclip (all below) are other alternatives, but I tend to go with Compressor.

MPEG Streamclip: Free. In their own words, MPEG streamclip is a “free video converter, player, editor for Mac and Windows. It can play many movie files, not only MPEGs; it can convert MPEG files between muxed/demuxed formats for authoring; it can encode movies to many formats, including iPod; it can cut, trim and join movies. MPEG Streamclip can also download videos from YouTube and Google by entering the page URL.”

Handbrake: Free. From the Handbrake website: "HandBrake is a tool for converting video from nearly any format to a selection of modern, widely supported codecs."

SCREENWRITING, WORD PROCESSING, SPREADSHEETS, etc.

Unknown-1.jpeg

Fade In: $80 ($60 for students). This isn't shareware, but it's affordably priced, especially considering the competition. The best, and simplest, screenwriting app I’ve ever encountered — and I’ve paid for Final Draft (countless versions) Movie Magic Screenwriter, Adobe Story (RIP), and also used Celtx when it was free. Fade In works with files from other screenwriting apps — especially Final Draft — flawlessly. The interface is just what I want: It looks good, it puts a focus on the words, and it’s easy to navigate through the script. I actually LIKE using it. It’s available for Mac, Windows, and Linux, and there's also an iPad app. I do still use Final Draft on occasion when I’m starting to go into production and deal with ADs, etc., but for writing, this is my favorite.

Scrivener: $60 ($51 for edu license). Like Fade In, this isn't shareware. But it is an awesome tool for keeping notes, research, and drafts in order as you prep a project. The one downside is that the developer has been promising an iPad version for years, and during that time people have been leaving the app for other competitors (like Ulysses).

Libre Office and Open Office: Free. These are essentially open source versions of the applications you find in Microsoft Office. (Do I really need to explain what you'd use these for?) Anyway, some people prefer Libre Office, others prefer Open Office. My day job supplies me with a free copy of MS Office, so I don’t have much of an opinion. They're both free -- download them both and give each a spin. Of course, another option is to work in the cloud using Google Docs (see below).

MISCELLANEA

App Cleaner: Free. If you’re reading this, you probably like trying new apps. The problem is that when you install new software hidden files and folders often get installed all over your computer. App Cleaner the easiest way to thoroughly uninstall unwanted apps. I use this all the time.

Super Duper: Free / $28 and Carbon Copy Cloner: $40. Backups are essential, and these are two great backup and disk-cloning solutions. I far prefer either to Apple’s Time Machine (which is a different thing altogether). I use SuperDuper, but Carbon Copy Cloner is very good too.

Cyberduck: Donationware. As the website states, Cyberduck is a "FTP, SFTP, WebDAV, S3, Azure & OpenStack Swift browser for Mac and Windows." My go-to app for FTP stuff.

screen800x500-300x188.jpeg

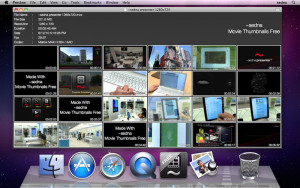
Movie Thumbnails: $3.99. This is really one of the best-kept secrets on the list. Movie Thumbnails lets you “create an overview or contact sheet of a movie combined with metadata like resolution, codec details and so forth.” We used this app to create contact sheets for every video file shot on Something, Anything, which helped us check on the wardrobe continuity or lighting for a shot from previous days of filming. Invaluable! Alas, I think this one is dead.

Pacifist: $20 shareware. This is one of those apps that you may only use once or twice, but you’ll be so glad it exists when you need it. Basically it allows you to drill down into Mac software packages to extract a single file from an installer. You may think you have no need for it, but like I said, it’s great at what it does.

QuickTime Movie NoteTaker: Free. Honestly, I’m not sure if this is still supported, and I confess I've not needed to use it in years.But this made the list last time and it might help someone out, so I’m listing putting here.

Self-Control: Free. The internet is a factory of distractions. If you don’t trust yourself to stay focused on that screenplay, use Self-Control to shut off the internet for a while. It works.

White Noise Free: Free. I get distracted if I can hear random conversations, music, etc. while doing deep dive work (e.g., writing or editing). Listening to white noise and a pair of good headphones helps me stay focused.

VLC Media Player: Free. From the website: "VLC is a free and open source cross-platform multimedia player and framework that plays most multimedia files as well as DVDs, Audio CDs, VCDs, and various streaming protocols." Plays almost anything you throw at it. We use this to cue up trailers at Public Cinema screenings.

CLOUD/WEB APPS:

I could make this a really long list, but I’ll keep it to a few that I use.

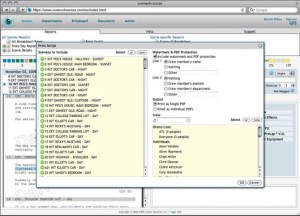
Scenechronize: Free and Paid versions. I used to use a very old academic edition of Movie Magic/EP Scheduling, which is really expensive, to do stripboards and scheduling. Then a few years ago we discovered this. We used the free version of Scenechronize on Something, Anything, and it was amazing. It's so amazing that I've bumped it to the top of this section, out of alphabetical order. The paid version allows teams to collaborate. Entertainment Partners smartly purchased this a while back.

Dropbox and Sync Free and Paid versions. You know what Dropbox is. Copy is pretty much the same thing. There are lots of other web apps out there that do what these two do. I used to love Dropbox, but Sync is simpler and does what Dropbox used to do before it started trying to be everything to everyone.

Google Docs: Free. I’m ambivalent about cloud computing, but I use Google sheets all the time. Google forms are great, too. We used them one, for example, at the beginning of Something, Anything to poll our crew about dietary restrictions, medical conditions, and so on.

Wordpress: Free. Many a great website has been built on the back of Wordpress. (In case you're interested, this site is built on SquareSpace. SquareSpace will cost you money, maybe too much money, but it's appealingly no fuss.)

STUFF I DON’T USE, BUT SOME PEOPLE SWEAR BY:

Blender: Free. Blender is used for, as the website says, "3D computer graphics software used for creating animated films, visual effects, art, 3D printed models, interactive 3D applications and video games." If you've ever seen my films you might suspect I know virtually nothing about this stuff. And you'd be right.

Lightworks: Free and Pro (Paid) Versions Lightworks was one of the first non-linear editors, and it’s been used to edit films like The Wolf of Wall Street, LA Confidential, Pulp Fiction, Heat, and Road to Perdition. You can compare the free and paid versions here. After Apple's FCP debacle in 2011, I was curious about exploring this, but by the time the Mac version of Lightworks was released Resolve had emerged as a NLE candidate.

Evernote: Free and Paid versions. I've never been a convert, but some people -- especially writers -- are almost cultish in their devotion to Evernote.

Hopefully this post introduced you to one or more apps that helps you be more creative and productive. If you like something that I've not listed, or have thoughts on any of the above, let me know.

Something, Anything - By the Numbers

A year ago today, Something, Anything had its world premiere at the Wisconsin Film Festival. Today, the film is available on iTunes, Google Play, Amazon, Vimeo, and Netflix. To commemorate an incredible, and exhausting, year of sharing the film with audiences here are some fun facts.

Something, Anything... by the numbers

22,474: miles traveled screening the film from April 2014 (premiere) to February 2015 (end of fest travel)

3333: days between emailing inquiry to Abbey of Gethsemani (first day of research for script) to world premiere (Wisconsin Film Festival)

961: gigabytes of original footage (AVCHD codec, in case you're interested)

371: days between first day of principal photography and last day of principal photography (August 14, 2011 - August 20, 2012)

159: runtime of the film's first assembly edit

127: scenes in final draft of screenplay

100+: actresses seen during casting for role of Margaret

88: runtime of film's final cut

71: dollars paid on Ebay for the main lens used to shoot the film (Nikon 50mm f/1.8 Series E)

58: locations filmed

57: Facebook posts on since April 2014.

33: speaking roles

24: music cues

14: festivals and cinematheque selections (as of April 5, 2015)

8: number of times Paul Harrill and Ashley Maynor moved from pre-production through post-production

7: average number of crew members (largest crew size was 14; smallest was 1).

6: different camera models used on various occasions through production

5: attempts made to film synchronized fireflies before succeeding

4: babies born to crew and cast members during the film's production, post, and distribution

3 and 1/2: stars (out of 4) given to film by critic Michal Oleszczyk in his review on RogerEbert.com

2: number of weeks Something, Anything was in Netflix's Top 50 streaming movies according to website InstantWatcher.com

1: scenes in which the character of Peggy/Margaret (Ashley Shelton) does not appear in the film

DIY Catering Part II: 4 Easy Ways to Go Green(er)

ASHLEY MAYNOR WRITES:

A few posts ago, I shared the first part of this series of tips on DIY Film Catering. (To read about 5 Essential Catering Tools under $50, go here.) This time, I focus on the seemingly impossible task of making a film with a small environmental footprint--there always seem to be compromises for the sake of convenience, time, or the other kind of green (money). While it's not always easiest or cheapest to take the eco-option, I have found four simple ways to keep our film catering a little bit greener without taking up too much time or cash:

1. Use Recycled Paper Plates + Compostable or Metal Flatwear: When faced with on-the-go shooting days, rustic or outdoor locations, recycled compostable plates and compostable corn-based flatware make clean-up easy and more affordable than you might think. Even Sam's carries 100% recycled, chlorine-free plates these days, so this "green" step can be nearly as cheap and convenient as using their plastic and styrofoam counterparts.

When we find ourselves in a semi-equipped location (i.e. an indoor location, especially one with a kitchen), I'll bring metal flatware, which cast and crew place in a plastic bin at the end of meals and I throw into a dishwasher that night for the next day. Caterer style stainless steel flatware sets can be had for cheap -- and, in the long run, are much more cost-effective than the environmentally-friendly disposable kind: They will last a lifetime!

Finally, if disposable coffee cups are a must for your set, opt for something like Chinet's Comfort Cups or Dixie's Vanity Fair Cups which paper-based and have recyclable plastic lids. Again, these are found at most major retailers and are less evil than their styrofoam versions.

2. Require BYO-Bottles &  Provide A Refill Station: Our film sets are BYO-water bottle for all crew. I also keep a few extra stainless steel bottles on hand for talent, PAs, and the inevitable forgotten bottles. Having designated, labeled bottles helps to cut down on waste--no more unidentified, half-drunk plastic bottles lying around! And I've found that many crew will keep their bottles attached to their belt loops with a carabiner. This constant access equals more hydration and less fatigue on set.

I recommend stainless steel over plastic since (a) you can avoid the whole BPA issue, (b) they are less likely to develop odors/bacteria, and (c) they can go through the dishwasher. You could even have some specially printed for your crew to keep as mementos from the shoot! (If you really want to go all out, you can get hot/cold insulated ones that will keep water cold and coffee hot and that don't "sweat" with condensation.)

Secondly, part of our BYOB system includes a refillable 2-gallon Brita Filter water dispenser to provide fresh, tasty water on set, using any available tap, without contributing at all to the world's bottled water dilemma.

3. Use Aluminum Food Prep Containers: Any Costco or Sam's can set you up with the industrial strength, catering style disposable aluminum pans. Because they are so heavy duty, you can actually use them several times (but don't put them in the dishwasher--they will turn brown!). Unlike glass casseroles, they won't break and unlike plastic they won't retain odor from other foods. They are great for transporting and storing cold food or you can also use them to heat hot food, either in the oven or using a sterno-catering setup on set. Best of all, you can recycle them at the end!

4. Keep Trash & Recycling Bins on Set: It can be a pain, at times, to provide both trash AND recycling bins but I just can't stand the waste on film sets. Even with our BYO-Bottle system, caffeine can create lots of waste on set. So, I make an effort to buy all sodas in aluminum (since it can be recycled many more times than plastic and without the toxicity) and recycle those at the end of each shoot day. If this seems like too much of a hassle, try using something like the Flings pop-up recycle bin and trash can--these are reusable, much more portable than traditional bins, and they might just make it easy enough for you and your crew to go greener!

 At Self-Reliant Film, we believe that the way you make something shapes what that thing is. So, while recycling on set or using biodegradable products might seem like a low priority, especially when working with budgets where every cent counts, we think even these small decisions can shape the work we're making. We want the stories in our films to be responsible (i.e. to tell uncommon stories with integrity and respect for the region where we make and set our work) and we believe a big part of that responsibility begins with how we treat the set, our crew, and the environment that makes it all possible in the first place.

If you have other easy ways to keep film sets more eco-conscious, we'd love to hear about it. Please share in the comments!


DIY Catering Part I: 5 Essential Tools under $50 for Low-Budget Film Catering

As we take a short break from our Fresh Filmmakers interview series, I'd like to share some of my tips and tricks for catering even the most low-budget of film shoots. Preparing your own meals rather than hiring professional catering or eating out can mean BIG savings, not to mention healthier and more eco-friendly options. With a small investment in a few tools, this can also become a relatively easy thing to DIY. Here are some essentials for the novice film set caterer (or micro-budget producer who is also caterer!) getting started:

--Hot Beverage Airpots--At just $15-25 each, these are worth their weight in gold; industrial quality ones with glass interiors will keep coffee and water piping hot for 8 hours. I use three on set (2 for coffee, one for water for making tea) for a crew of 10-15. These are easily purchased at a nice discount compared to online stores at most big box grocery outlets, such as Costco or Sam's Club.

--Crock Pot--Whether it's a soup-n-sandwich lunch, a roast dinner, or a hearty mac-n-cheese, crock pots make it easy to have a hot meal on even the most bare bones of sets/locations--all you need is a place to plug in! I recommend you get a big one; plan to spend between $30-50. For even more rugged shoots with no power source available, you can also consider a camping stove or single, kitchen-grade (portable) gas burner, combined with a large pot or skillet.

--Rolling Cooler--While I use reusable water bottles on set (more on this in a future post), a cooler is essential for toting sodas and perishable food items or cold meals. Do yourself (and your back) a favor and get one with wheels for about $50.

--Ziplocs, Post-It Labels & Sharpie--I find myself labeling bags of food for actors with special diets, repacking bulk food items into smaller containers to save money, etc. Also, after each shopping trip, I label all of the food in the fridge with the corresponding shoot day. This allows me to easily delegate food prep to other crew members or PAs on hectic shoot days.

--Camping-Size, Adjustable Folding Table --This miniature version of the traditional folding table will pack up easily in the backseat of a small car or standard size trunk and can easily turn a parking lot space into a craft services area. Budget about $50 for one of these online.

I will often open the hatchback trunk of my small SUV, instantly turning the trunk into ongoing coffee/beverage area and provide snacks (all-day) and meals (every 5-6 hours) available on the folding table. I use a combination of the rolling cooler and a few $10 Ikea folding chairs as seats when the location is too small, when all or part of the set is "hot" and food poses a continuity danger/problem, or when locations aren't able to accommodate our crew for this purpose. So, for a mere $150, you can ensure the ability to serve food on a film set most anywhere.

While craft services and good food might seems like a luxury for low and micro-budget filmmakers, I believe that providing quality food, beverages, and snacks on set keeps morale high--especially when folks aren't being paid. From a producing standpoint, there's simply no better cost-to-value line item in my budgets.

In upcoming installments, I'll share more ideas for making greener, healthier, and relatively inexpensive menu and catering choices. Stay tuned!

A Dozen Useful, Low-Budget Camera-Related Items

As you may have gathered from Ashley's recent post about art department lifesavers we have been doing some filming lately. After several days on set, I've come to deeply appreciate some small, even seemingly minor, accessories and pieces of camera-related equipment -- "kit" in industry parlance. I thought I'd discuss a few of these items, each of which is under $200. We're using a Sony FS100, a Red Rock Micro follow focus and low-rise baseplate, an assortment of Nikon lenses, and a Heliopan variable ND filter, but many of the items listed below would be at home on a DSLR-based shoot or a shoot with a more traditional video camera (Sony EX1, Panasonic HVX200, etc).

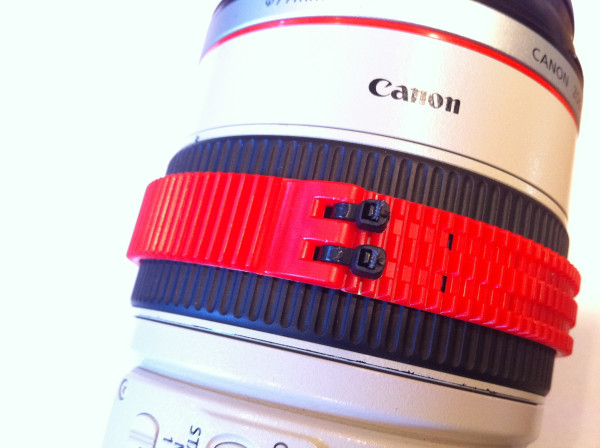
Zip tie lens gears. Lenses that were designed for stills, not cinema, lack a gear that allows them to be used with a follow focus. One solution would have been to use the gear rings that we had from Red Rock Micro. These are functional, but they have a number of disadvantages: they're large, they can be time consuming to put on/take off, and at $40 each, they're overpriced. Zip tie lens gears are inexpensive and easy-to-add to every lens you own. Once on your lens, you can forget about them. $40 for 3. 

Wet Erase Markers A good set of wet-erase markers will help you make marks on your follow focus ring. We like wet erase, not dry erase, markers because the dry erase ones will smear. $7.
Filter pouch. Our Heliopan Variable ND filter comes in a less-than-ideal case. It's a very tight fit, to the point of seeming like it could scratch or scuff the glass. We quickly bought a filter pouch to protect our investment. $9.

77mm step up rings and lens caps. We use a 77mm variable ND filter on set, which at that size has the ability to cover all of our lenses when using step-up rings. After a few days of filming with one step-up ring per size needed (e.g., a 52-to-77, a 62-to-77, etc.) we found that we were being slowed down by having to unscrew the step-up rings from lens to lens, particularly when so many of our most-used lenses (e.g., 28, 35, 50) all had a 52mm threading. So we splurged and purchased the necessary step up rings for all of our lenses. Now all of our lenses have a 77mm "face" (and accompanying lens cap). Though step up rings seem like an inexpensive piece of kit, read the reviews and buy a reputable brand like B+W, Heliopan, etc. Lesser step up rings can seize up, making that expensive variable ND filter a big headache! Step-up rings: $25 - $45.  Lens caps: $5.

Lens cleaning tools.  We switch lenses and filters often, which means more chance of dirtying them. We keep our glass clean with: Nikon Lens Pen. $7 Kimwipes. $5 Purosol Lens Cleaner. $8

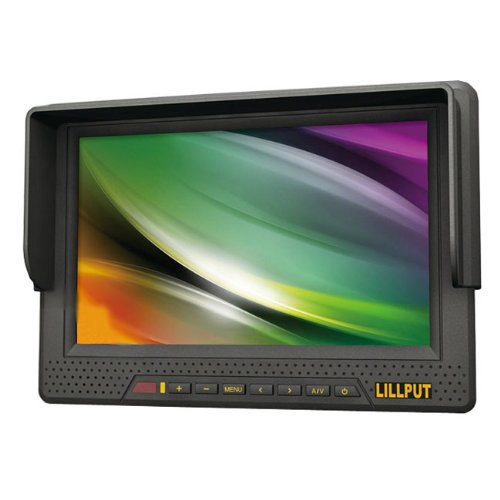
Lilliput 7" 668GL On-camera HD Monitor In 2010 I read about Lilliput's small, inexpensive HD monitors. At the time, they only seemed to be sold on Ebay. I bought one off almost as a novelty, not expecting much from it since it was so much cheaper than other HD monitors on the market. While its picture is not as vivid or high resolution as that of other portable HD monitors I've used, it works, it's lightweight, and it's far more affordable. The one I bought over a year ago didn't have a battery pack like the new ones they make, so I had to buy an Ikan battery AC/DC adapter plate, which allows me to use Sony batteries with it. The new models, which you can purchase through Amazon, now come with their own battery solution and component inputs. As for its application, I tend not to use it if I'm operating camera myself, but when working with a DP or camera operator I use it as my "director's monitor." It's especially useful when filming in tight spaces (like a car -- see below) where using your camera's LCD monitor or viewfinder isn't an option.  $170.

HDMI Cables It's nice to have different lengths of HDMI cables to use with the Lilliput monitor. I've used these Insignia brand cables on set for a few weeks and haven't had any problems. One's a 9 footer, one's a 3 footer. $10.

FilmTools Gripper 116 XL car mount. Trying to shoot smooth car footage handheld , particularly with a CMOS sensor prone to "jell-o", can be a test of one's patience. This FilmTools car mount affixes to your car's windows or windshield with a large suction cup and will support cameras up to 9 pounds. $110.

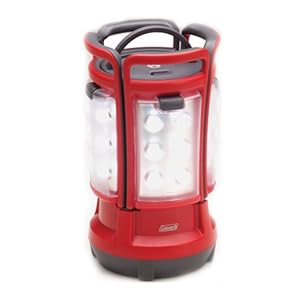
Coleman LED Quad Lantern This ingenious LED lantern can be split into four smaller LED sections, which have a functionality similar to micro Litepanels at a fraction of the cost. We've used the "quads" for driving shots by hiding them on the ceiling, in the dashboard, and on the floor. Beyond driving, they're useful for any situation where you might not have access to power and don't need to light a large area. And if you need more light than one puts off, you can gaff tape them together. Though they're not necessarily color corrected like a those designed for video use, they work great if you throw a gel on them or dial in the appropriate color balance setting on your camera. Plus, when you're not filming, the lantern can be used for camping -- you can't say that about a micro Litepanel! $58.
Two-Way Radios Or, as laymen call them, "walkie talkies." I'm usually not working on a set that's so large that we all need to be outfitted with professional two-way radios and headsets. That said, it's nice to have an inexpensive set on hand for those occasions when your cast and/or crew is in different areas. I find them essential when shooting exterior car scenes (i.e., those in which the camera's outside the car, filming actors driving). It's the easiest way I know to cue talent or ask for another take. Roughly $35-$75, depending on features.

Canare breakaway cable For the uninitiated, a breakaway cable consolidates multiple XLR and mini cables into one neat cable, which can be run from a location audio mixer to a camera (or audio recorder). Though it may seem overpriced for what is seemingly a bunch of XLR and mini plug cables wrapped together, if you're using a mixer and feeding that audio into your camera the simplicity, organization, and mobility that a breakaway cable provides is well worth the cost. In addition to feeding your camera two tracks of audio with one cable, a good breakaway cable also give the sound mixer a means to listen to the "return" audio instead of the audio from the sound mixer. This is the best way to monitor the audio being mixed, so for me it's worth the investment. $190.

15 Essential (and Inexpensive) Tools for Wardrobe, Hair, & Make-Up

Filmmakers love to talk about tools. The blog-o-sphere is rampant with posts about cameras, lights, and cinematography accessories, but despite all the attention on achieving great looking films from an equipment/technology standpoint, there is far less discussion about low-fi ways to make your film look like a million bucks via attention to wardrobe, hair, and make-up. I've recently jumped on the Mad Men bandwagon, catching up on the last four seasons. Whether you love or hate this show (a quick look at the Mad Men Wikipedia page will give a sense of the heated debates this show has provoked among critics), it's hard not to be in awe of its production values, in general, and art direction, in particular. While probably no one reading this post has the budget that Mad Men does, it doesn't mean we shouldn't attend to art direction with the same care.

Both as a film festival programmer and as a university instructor, I have seen how, all too often, art direction (much like sound design!) is neglected in first films and student films. It's easy to spot an amateur effort when gangsters are wearing Converse One-Stars (yep, I've actually seen this) or an MRI machine is made out of cardboard (After Last Season, anyone?).

A single post can't address the complex and time-consuming process of art direction--how to do it, how to do it well, and how to do it on a budget--but assuming art direction is receiving at least some of the attention it needs in your production, here are fifteen of my favorite inexpensive tools--none of them should run you more than $25--to help get you through the inevitable wardrobe, hair, and make-up emergencies:

  1. Fanny Pack -- While these might conjure memories of bad '80s fashion or annoying tourists, a good art director has essential tools on her at all times (without needing to run to find her tool bag) and needs her hands free. And, unlike decades past, you can find cute and functional fanny packs these days. Try Natural Life for styles with flair or Mountain Smith lumbar packs for a more muted look. All of the supplies/tools below should fit into your pack.
  2. Downy Wrinkle Releaser -- Wrinkles are a continuity nightmare, and on a DIY set, lugging and plugging in a clothing steamer or iron isn't practical. This spray works best on cotton or cotton blends; avoid using it on delicate fabrics (e.g. silk, satin).
  3. Mini Lint Roller -- Keep hair, link, and other fuzzies off of clothing to help preserve continuity.
  4. Mini Sewing Kit, with needle/safety pins and mini scissors. -- Fix rips, tears, or buttons right on set. In a pinch, borrow some gaffer's tape to repair a seam--I've created makeshift curtains on set with fabric and gaff tape alone.
  5. Seam Ripper -- If you have never used one of these before, prepare to be amazed! Seam rippers are specialized tools--something between a razor blade and scissors--with a very pointed tip and sharp base. Unlike scissors, the tiny point can be easily threaded under a stitch for easily cutting out seams without hurting the surrounding fabric or causing holes. Remove an annoying clothing tag, lengthen a hem, or deconstruct a garment in seconds!
  6. Flexible Body Measuring Tape-- You'd be surprised how often you can use this, either for wardrobe measurements or on loan to the camera department for focus pulling and actor marks when they've forgotten or misplaced their measuring tape.
  7. Instant Stain Remover (such as Tide To-Go mini) -- This really works on stains caused by foundation, lipstick, and coffee -- three common art emergencies. I prefer the stain remover pens to the wipes, as they don't rub the stain into the fabric.
  8. Clear Medical Tape (and/or double-sided Fashion Tape) -- Medical tape is sweat-proof and nearly invisible on skin--great for taping lavs to bare skin or securing clothing straps. Fashion tape comes in pre-cut double-sided strips and is great for invisibly holding clothing in place.
  9. Mini First Aid Kit with Blister Cushions and assortment of travel size packs of Acetaminophen/Ibuprofen/Aspirin/Pepto Bismol/Bug Repellant/Sunscreen -- The producer should have a full-blown first aid kit on set at all times, but I like to have supplies of my own for the unexpected emergency situation or when that kit is out of reach. Blister blocker band-aids are amazing for stopping blisters but can also be used to protect skin from irritation from mic packs or other costume nuisances. Having pain killers and stomach ache cures on hand is essential for keeping talent and crew happy. I also like to keep Hot Hands available for cold mornings on set.
  10. Assorted Bobby Pins -- Having a few sizes and colors (gold for blonds, black for brunettes) will help hold stray hair in place, pin back clothing, etc.
  11. Sharpies -- I use black to cover scuff marks, silver for writing on black gaffer tape, and red for when I need what I'm writing to be seen! You might want to get the mini sharpies that can be tied to lanyards for instant access around your neck.
  12. Concealer, such as Max Factor Pan Stick , to cover blemishes. This pan stick will also cover tattoos fairly well (if airbrushing isn't in your budget--ha!) and the price is right. A shine reducing, translucent powder is also make-up's best friend.
  13. Hand Sanitizer -- Alcohol based ones double as stain removers and can take out ink stains fairly well.
  14. Breath Mints or Gum -- Again, the talent will love you for this.
  15. Super Glue -- I recommend a few of the mini tubes for situations where tape won't do.

If you've got other art tools you can't live without, please let me know in the comments!

Attending to wardrobe, hair, and make-up comes with less glory (and, perhaps, on the positive side, ego) than that of Cinematographer or Director, but it's no less responsible for making the difference between a successful film and an unsuccessful one. It can make the story world credible or incredible, real or surreal. What's more essential than that?

How to Build a Lens Collection

Today I was reading a camera discussion forum in which someone asked how to build a lens collection on a budget. He was looking for Nikon lenses to use on a Sony NEX-FS100 camera. I could relate -- I was in his position in 2006 when I started to look for Nikon glass to be used on video cameras with a Letus, on the Red One, and so on. I hadn't purchased a lens since my senior year in high school (for my venerable Pentax K-1000), and I knew only the most basic things to look for. Since then I've built up a nice collection of Nikon lenses, which now work on a host of cameras. I love my Nikons and have no regrets!

So what follows are some very basic tips I've learned on how to build a lens collection. I make a few allusions to Nikons vis-a-vis the NEX-FS100 below, but my advice could just as easily be interpolated for someone buying Canon lenses for the Red Epic or a Panasonic AF-100.

1) Determine your needs. Obviously, you need to think about what kind of coverage you want. Even if you primarily shoot wide angle footage, you probably also want a normal and a telephoto lens in your bag. But only you know your tastes. Likewise, only you know your budget. You're going to be keeping this in mind as you build a list and prioritize your needs.

But beyond these things, there are other considerations:

What cameras now and in the future, might you use these lenses on? Do your lenses need to be full-frame to be future-proof? Must they have aperture rings? I prefer having aperture rings on my lenses because I sometimes have to use "dumb" adapters (i.e., those that can't control aperture).

Since I was working with a very limited budget, for me, the most important question when I began building my collection was whether to go for primes or zooms. I primarily would be using these lenses to shoot narrative work so I opted for primes; if I was shooting a documentary, I'd want a good zoom lens (if I was shooting with the NEX-FS100, would actually just get the Sony kit lens since autofocus is nice to have in a pinch).

The thing to remember about zooms intended for still lenses is that they are often not parfocal, which means that they don't hold focus across the zoom. (Some are. You have to test to find out.) To me, a non-parfocal zoom negates at least part of the purpose of having a zoom, so that's another reason I went with primes.

2) Familiarize yourself with the lenses that are out there. Researching Nikons, I visited sites like Photozone and those by Bjorn Rorslett (go to the LENSES page and then dig deep into his reviews, especially the "Best of" page) or Ken Rockwell. Different people trust different reviewers (some people HATE Ken Rockwell, for example). But the point is this: When all the websites praise a lens, that's a pretty good sign of a winner.

I'm obsessive, so I prefer to make lists and tables of all the lenses I'm considering. It helps me keep track of what I've looked at, the (dis)advantages of each, and the price.

3) Read reviews, but with a grain of salt. Remember that if you're only going to use lenses for video, you don't have to fret about their resolving power nearly as much. A lens intended for full frame negative film or a 16MP digital camera must resolve far more detail than you'll ever get out of HD or even 4K video. For example, many lens testers worry about blurring in the corners; you don't have to worry about this quite as much since using a full frame lens on a Super35 sensor means you're using the sweetest spot of the lens.

Having said all of this, I do think you should buy the best lenses you can afford. Like microphones, and unlike video cameras, they tend to hold their value for much longer. In 20 years we may be shooting with cameras that capture 8K footage… and it's possible I could still be using my Nikons.

4) Test. Try out the lenses you're considering, especially if they're pricey. Assuming you don't have a friend who happens to have all the Nikons ever made, your two best options for testing are a) visit a fantastic photo store in your area and try out the lenses or, if you don't have a great photo store (I don't), b) rent the lenses. I've saved a lot of money by spending a few bucks to rent a bunch of lenses and then buying the one that I actually like. (I have happily used and endorse LensRentals.com. I have received no promotional consideration for that endorsement.)

5) Buy used (if possible) and buy smartly (always).

Start by finding out the going price for a used lenses by visiting KEH and the going rate for a new version on B+H or Adorama.

If KEH has the lens, and you have the money, buy a lens from them -- they grade their lenses very fairly and have a great return policy. (Again, I've received nothing from them for this endorsement.)

If they don't have it, or it's too pricey, go for one on buy on Ebay, keeping the KEH prices in mind. If you're going for AI-S lenses you can get GREAT bargains on Ebay since many photographers, needing autofocus, consider these obsolete lenses. When buying on Ebay all the usual cautions apply. Make sure the seller has fantastic ratings and that the photos clearly show the quality of the lens. Only bid on the lenses that look pristine.

Whatever you do, don't overpay! If a lens on Ebay starts approaching anything close to its price on KEH, just get it on KEH and be done with it. The return policy will be far better than the risks you take with an Ebay seller. Or wait for another auction.

6) Watch for warning signs and, if necessary, seek help. I say this jokingly, but building a lens collection can be addictive fun -- and can distract you from the real purpose of building a collection, which is to go out and film! Don't say you weren't warned.

If you have other tips or disagree with any of the above, share in the comments below.

Launched: The New Self-Reliant Film.

If you're looking at this website in anything other than an RSS reader you can probably tell that we've completely overhauled the website. Thanks to our wonderful designer friends at Nathanna, we've both expanded and simplified the Self-Reliant Film website.

As we mentioned a few weeks ago, our new look is based on some new directions for the website.

Today, with the launch of the new site you can do a few things that you couldn't do before:


Sign up for the email list. Our new email newsletter will have exclusive content we don't put on the blog. We’ll share tips on great films we’ve recently discovered, we'll provide some extra filmmaking tips, and you’ll get access to see our films for free. The newsletter is only sent once a month, we never sell or share others’ email addresses, and it’s ad-free. Subscribe!


Watch our films: Some folks that visit this site do so because they're fans of our films. Others visit the site because of the blog. If you've not seen our work, or you want to see our films again, or you want to see more of them… we've spelled out all the ways to watch.

The easiest and least expensive way is to sign up for the email list. But there are other ways, too. Find out more here.

Must reads: Look to the sidebar on the left. These are a few of the most popular posts on the site. Check them out if you're new here or if you've not read these. The Declaration of Principles was the first post on the blog, and it's still pretty much as relevant today as it was when it was drafted in November 2005.


Resources: If you click on "Resources" (look to the upper left of this page) you'll see some of the more helpful pages we've assembled for filmmakers (and everyone) since beginning the site. Over the coming weeks we'll be updating and expanding these pages.


Submission guidelines: We've always received emails from readers wanting us to watch and/or review our films. This has been done pretty much catch-as-catch-can in the past. We finally drew up some ideas about how to do this, as seen in the sidebar on the left. We want to review and put a spotlight on great films more than we've been able to recently. This is a way to encourage this. Click on the Submission Guidelines and and let us know if you've got a film you want us to watch.


What hasn't changed?


Our blog still features all the same stuff that we've championed and discussed from the beginning -- DIY, regional, and personal filmmaking. We've moved it to selfreliantfilm.com/blog, so update your bookmarks.

(If you bookmarked an old page from the blog it should automatically redirect to the new permalink structure, but if you encounter a broken link, let us know!)  

Finally, one other thing that hasn't changed: This site is still ad-free.

For us, self-reliance has always gone hand in hand with the idea of simplicity. While filmmaking is a vocation that often resists even our attempts to simplify the process of making movies, we feel the least we can do, sometimes at least, is keep our tiny corner of the internet quiet from flashing banners, pop-ups, and google ads buried within our own reflections. This website, like our films, continues to be a labor of love.

We hope you like the new site, and the things to come. If you do, spread the word by sharing with a friend by using facebook, twitter or, you know, by actually telling someone about it face-to-face.

The Panasonic GH2: Some thoughts.

I have made no secret of my frustration with DSLRs for making motion pictures. I've wanted to love them, sure. In my quest to find a small camera I could love, I've bought and sold (or returned) a Canon 7D, Panasonic GH1, and a Nikon D7000. The Canon and Nikon were each impressive in their own ways, but I gave them both up because I could never fully trust the image that I saw in their LCDs. After being burned a few times by outrageous moire that only appeared once I could view footage on a real monitor, I gave up trying to shoot with those cameras. The GH1, which I tested last summer after my frustrations with the Canon cameras, was more promising, especially with the ballyhooed firmware hack that surfaced last year. That camera didn't have problems with moire or aliasing, and its mirrorless design (the GH1 is not, technically speaking a DSLR at all) opened up the opportunity for using several different types of lenses (PL-mount cine lenses, Nikons, Canons, and many more).

Unfortunately, the camera clearly felt like the product of a "consumer" division of a large electronics company. Parts of the camera felt shoddily put together, there were reports of design issues with the lugs that held the neck strap and, worst of all, the camera exhibited a nasty fixed pattern noise problem that made any dim area in a shot have strange vertical blue streaks. Hacked or not, the camera didn't seem ready for prime time. Hope springs eternal, though. I thought, Panasonic might be onto something if only they would fix some of these glaring problems.

In December, I managed to get my hands on the GH1's successor, the still-hard-to-find Panasonic GH2, shortly after they arrived in the US. A month or so later, here are my thoughts on the camera as a tool for filmmakers.

The GH2 is not a perfect camera -- no such thing exists -- but it does fix a lot of the GH1's problems. As such, I feel like I can finally endorse a DSLR for motion picture use. (And yes, I know, it's not a DSLR. But the term "hybrid camera" just sounds weird.) I think it's the best camera you can buy for under $1000. It might be the best camera you can by for three or four times that. Lest you think this is going to be a rave review, let me lay out my curmudgeonly gripes about this camera:

- Size and build. If you are used to the rugged build quality of a Nikon D7000 or Canon 7D this camera feels like a toy. It's a bit too small for my tastes and the buttons feel a little flimsy. I'd pay $500 more for it to be as rock solid as a Nikon or Canon. Furthermore, the lug nuts that hold the shoulder mount seem to follow the same design as the GH1. There may be improvements on the inside, but simply seeing the same parts and placement doesn't inspire confidence. If you insist on wearing a neck strap, I recommend purchasing a Black Rapid RS7 strap, which screws into the camera's base.

- Lens selection. The Micro 4/3 format lacks the robust catalog of lenses that one finds with APS-C and full frame sensor cameras from Nikon and Canon. As most readers probably know, the M4/3 system effectively renders lenses with a 2x crop factor when compared with 35mm still photography. (M43 is much closer to the size of 35mm motion picture film.) Since a 20mm lens on a GH2 has the field of view of a 40mm lens on something like the Canon 5D Mk II, the question of how wide one can go with the M43 format is a legitimate question. Compounding this issue is the fact that Panasonic's "pro" M43 zooms (14-140 and the 7-14mm) are slow. Olympus makes a great couple of fast zooms (f/2.0!), but they require a 4/3-to-Micro4/3 adapter. Probably the sexiest native lens for the camera is Voigtlander's super fast 25mm f/0.95. Regardless of which of these you choose, you're spending from anywhere near $1000 to $2500 for a lens that won't work on either of the other major camera systems (e.g., Nikon or Canon). If the next great camera that comes down the road isn't a Micro 4/3 system camera, but something with a larger sensor (and this is considerably likely) an investment in M43 glass may not repay long term dividends. That said, there is a solid work-around solution. More on this later...

- Programmability. The programmable function buttons on the GH2 can only be set to engage functions that are fairly useless for filmmakers. The ability to customize the camera's buttons falls far, far short of something like the 7D.

- Power. The battery does not last long, especially if you are using a native M43 lens like the Panasonic 14-140 that ships with some kits. That lens has image stabilization and it drains the battery fast. Even with lenses that don't pull power you'll need to buy at least a couple more batteries. And you'll probably also want a AC/DC power adapter. Panasonic doesn't seem to be making or selling those yet, so chalk that up as yet another (hopefully temporary) frustration associated with the camera.

- Documentation. The acronym RTFM takes on new meaning here, as the manual included is one of the most poorly written technical documents I've ever read. I hope the authors never try their hand at writing the instructions for heart defibrillators or how to perform CPR. Compounding this fact, the American edition is not available as a PDF. I resorted to essentially writing my own translated version of the manual for the camera and threw out the "official" one Panasonic.

- Gamma Shift. The camera has a strange bug in which the gamma shifts after you press the record button. Will this be fixed by a firmware update? Who knows. If it came from Panasonic's pro electronics division, I would expect one. Coming from the consumer division I have less confidence, particularly since releasing firmware could open the camera to another firmware hack. (Don't get me started about the idea that a company wouldn't want its users to tinker with, and better, its products.)

- Recording Media. I'm not crazy about using SD cards. CF cards (like those used by the Canon 7D and 5D Mark II) are are more rugged and they're harder to lose. But the D7000, as well as the Canon 60D, T2i, and even the Panasonic AF-100 use SD cards, so I guess I need to get over this. SD cards are less expensive, I'll give them that.

- Recording standard. Though it may not affect us Yanks, there is no 25P mode for PAL users. I can't understand why Panasonic would be so short sighted as to ignore this feature.

- So-so stills. As a stills camera, the GH2 isn't going to compete with something like a Nikon D7000 or a Canon 7D or 5D Mark II. But this fact doesn't bother me so much. My photography is mainly limited to location scouting, holiday snapshots, and photos around my home, documenting the change of seasons and the comings and goings of friends, family, and animals. The GH2 is enough for me, but if you want a camera for serious, professional photography, you will probably look elsewhere. Personally, if I needed something heftier, a Nikon D7000 or a Canon 7D would suit me fine. Though they are more expensive cameras, they're not that much pricier, and you get what you pay for.

Yet, most these complaints have work arounds, particularly when you consider what the GH2 has going for it over other DSLRs:

+ No more rainbows. Far less -- and far, far less offensive -- moire. It's simply not an issue. I don't worry about it. At all. I actually feel like I can trust the image I see in the LCD or viewfinder. What a concept!

+ Less aliasing. 'Nuff said.

+ No overheating. The camera acts as if it actually wants to stay on and let you continue filming as long as you want.

+ Sharper. I've not shot any charts, but to my eyes the image looks sharper than that of the Canons and Nikon, particularly on wide shots.

+ Adjustable LCD. Like the GH1 before it (and like the Canon 60D), an adjustable LCD means you can put your camera in tight spaces and continue to watch the footage. Plus, you can see your footage in bright daylight; there is no need to purchase a Z-finder (or similar).

+ ETC mode. The camera's 2X crop "ETC mode" gives you, in effect, two lenses for every one you own. I find it only somewhat usable because of the increased noise, but no other camera (that I'm aware of) even has such a feature and it's far better than any digital zoom.

+ 24p filming. This is an improvement on the GH1, in that cinema mode filming isn't contained in an interlaced wrapper. It's true progressive.

+ No fixed pattern noise. This is the GH2's biggest improvement over the GH1. There's no need to try to use voodoo on your camera to make the noise go away.

Also, for those that want it, the GH2 has autofocus in video mode when using native M43 lenses. I don't care about AF and I've found it to be slower than advertised. But it does work.

As I see it, these are all very big gains over most other DSLRs.

Finally, let me address two issues others have raised about the Micro 4/3 format:

One complaint is that the sensor is too small to get shallow depth of field. Eh, this is not much of an issue to me. First, you can get shallow DoF with the camera. It's far more than you're used to with any 1/3" or 2/3" video camera. Can you get razor thin DoF like on the Canon 5D Mk II? No. That's a VistaVision sized sensor, there's no comparison. But having your subject in focus is, these days, a somewhat underrated concept. Micro4/3 strikes a nice balance between allowing you to render backgrounds out of focus and allowing your performers room to move.

As for the complaint about lenses -- which I myself made above -- so far I have found that the best price/performance option is to purchase manual focus Nikon glass (say, a 20mm, 28mm, 50mm, 85mm, and a 105mm) along with a Nikon-to-Micro4/3 adapter. You can even get an adapter for Nikon G-series lenses (i.e., lenses without an aperture ring), which would be most useful with something like a Tokina 11-16 f/2.8 lens. Users of Canon glass are limited to something like a Kipon adapter, which fakes an aperture, only somewhat successfully. The great thing about Nikon glass is that it's usable on Canon cameras, too, as well as, of course, Nikons. Should either of those manufacturers step up and invent the next great HDSLR, you won't miss a beat.

In the end, I would say the GH2 is a step forward for DSLR filmmaking. Even if I can't help but feeling at times like it succeeds in spite of itself (or, more accurately, in spite of its manufacturer) I like the camera and the image it produces. But, it's just a camera. If you've been making films with the 7D or the T2i -- or whatever camera -- and you love it, well, use that. There is no need to switch if something is working for you. If, however, you're a filmmaker that, like me, has longed to work with DSLRs because of their small form factor, but you've been put off by their frustrations, the GH2 is worth a look.

DSLRs, "Democratic Technology" and The Cost of Bokeh: Part 2

This is the second of two posts considering the rewards and challenges of using DSLRs for cinema work. If you've not read the first post, start there. At the end of the last post we had assembled a Canon 7D camera, a Canon 17-55 f/2.8 lens with Image Stabilizer, a Zoom H4N audio recorder, and PluralEyes software to help us sync the picture and sound in Final Cut Pro. The cost: $3230. I hesitate to call this a "bare bones" package since it doesn't even include a tripod or microphones. It does, however, get you picture and sound.

But you get picture and sound with a pixelvision camera. My intention with these posts is to compare DSLRs to a more traditional prosumer camcorder. And we still have a ways to go before it's a fair comparison. So let's continue...

For starters, the Sony and Panasonic cameras have ND filters built into their cameras. And while there may be some optional kit with the Canon DSLR rigs, ND is not one of them. Not, at least, if you want that creamy shallow DoF cinema look, which is probably the reason you bought the Canon in the first place.

Some people, including Philip Bloom, swear by the FaderND, which cuts out between 2 and 8 stops of light. If you find it on Ebay you'll pay around $125. Very cool!

Others, though, argue that the FaderND can make color correction a problem later on. Indeed, the quality of your lens is reduced if you put inexpensive glass in front of it. (Or, as Shane Hurlbut warns, "beware the reaper of cheap glass"!) So if you do want to be careful, you would need to budget between $275 and $450 for a set of high quality Tiffen "Water White" IR ND filters.

If you've got multiple lenses with different filter ring sizes you'll need to purchase step-down rings. But for now, we're assuming we only have one lens.

Let's throw caution to the wind and go with the Fader ND. That puts us at $3355.

We also need to power the camera and record to something. So we need some CF cards and we need some batteries.

We would obviously need batteries if were were going with a more all-in-one solution (i.e., an actual video camera) like Sony or Panasonic. But in my experience the batteries supplied by these manufacturers last about 2x as long as those supplied by Canon, in part because the Canons weren't really built for, you know, constant video footage. And, a manufacturer like Sony or Panasonic supplies an AC adapter so you can run your camera off wall power. Canon does no such thing. So to be fair, we'll add the cost of two batteries ($156), even though you'll actually need four or five to shoot a day's worth of footage.

As far as CF cards are concerned, for a starter package, we'll figure you need 32GB of CF memory. That's about $77. Hurlbut makes a compelling argument that you should use lots of 8GB cards instead, but we'll stick with one card, which gives you about the same recording time as the 16GB SxS card that comes supplied with the Sony Ex1R (roughly an 1 hour).

What are we up to now? $3588.

Finally, in my experience, I've found you need some sort of way to monitor your footage. The on camera LCD focusing system is not large enough to accurately focus on the fly. And it is often impossible to use in broad daylight.

The focusing issue is, for some, a real deal breaker, and for good reason: Everyone I know that has used this camera has shot footage that appeared to be in focus but, upon later inspection on an actual monitor, learned that the take was a bust. You have to be very careful about monitoring your footage, and you need to check every shot on a large monitor (Hurlbut recommends a 24" LCD) before you move on to the next setup.

I'm not going to include the cost of the 24" LCD. We're going bare bones here. So we're going to use a Zacuto Z-Finder ($395), which magnifies the camera's LCD viewfinder.

Another option is to use an external monitor while shooting. The advantage is, obviously, a larger viewing area to judge focus. The disadvantage is that once you add an external monitor (with battery pack, HDMI cable, and hardware) you lose the small, stealthy DSLR form-factor. Good monitors are expensive, too, often averaging around $800-$1000. The cheapest possible monitor option, however, gives the Zacuto Z-finder a run for its money. That monitor is the Lilliput 669GL.

The Lilliput is only $220, but you'll need a battery solution. I recommend the Ikan 107S or P ($68) depending on whether you already might have some Sony or Panasonic batteries. And you'll need a special MiniHDMI-to-HDMI cable ($12). And you'll need an arm (Ikan's MA206 is the cheapest somewhat decent solution at $70) to mount the monitor to your camera.

The total cost of the Lilliput option as I've described it is around $350. If you need Sony or Panasonic batteries to power it (and a charger to charge the batteries) then your total will exceed that of the Z-finder. So let's just add $395 for the Z-finder and be done with it.

By the way, I've not been tallying shipping costs on these items, but lots of places like Amazon, B+H, and Adorama offer free shipping on certain items, so you might get lucky.

I think this does it for a bare bones kit. Remember, my estimates do not include the things you'll need to actually shoot for an entire day -- things like extra batteries, multiple CF cards, a camera bag or case(s), a shoulder mount, or a tripod. Nor does it include things like quick release plates for your tripod and shoulder mount. Nor does it include any sort of rod system or a follow focus, which you may want since the whole purpose behind using these cameras is to have that all-important shallow depth of field.

The final total? $3983.

That's twelve dollars cheaper than Panasonic's HPX-170.

So the question is, which do you want?

Traditional low-level professional camcorder: - not a stills camera - less cinematic depth of field - fixed lens - somewhat video-ish handling of light + actual HD resolution + accurate focusing + less pronounced jell-o problems + single-system sound with XLR inputs +/- all in one build (pros: it's meant to be used this way; cons: looks like a video camera) + solid HD codec + stability/durability as a camera intended for video

Canon DSLR: + great stills camera + cinematic shallow depth of field + option of interchangeable lenses + beautiful handling of light - difficult-to-edit codec with "reversal film" (i.e., limited) flexibility - less-than-HD resolution - issues obtaining accurate focus - aliasing and moiré problems - jell-o problems - double system sound with separate sound recorder +/- modular build (pros: pick what you need; cons: you're only a strong as your weakest link) - some overheating problems*

* Did I mention that there have been some issues with overheating since video on these DSLR's is so demanding? If the camera overheats, it may not work for a while. One solution is to have another camera body on hand (+ $1700).

***

Look, I'm not advocating one camera over another. And I am not trying to diss on the DSLR revolution. I'm just trying to cut through the hype to talk realistically about the choices that exist for a low-budget filmmaker.

Cameras -- like life, art, and love -- are full of compromises. The question is, what are the compromises you can deal with, and what are the deal breakers?

Just how badly do you want that bokeh?

Are you willing to sacrifice reliability?

Are you willing to risk losing half a day's worth of work?

Are you willing to endure slow-downs because you have to re-shoot footage?

If so, how much?

I don't have the answers. At the beginning of this series I said I was ambivalent. And I meant it. I haven't made up my mind about these cameras. I doubt I will. It will be a case-by-case, project-by-project thing.

I think there will be some times where these cameras are appropriate for me to use. They're great for clandestine filming. I like them for filming in/with/around cars. I like the way they handle close-ups. If I was single-handedly making a shot-for-shot remake of The Passion of Joan of Arc, this would be my camera. (Hmm…)

But if I had to choose only one camera to own, a DSLR would probably not be it. I won't even consider it for documentary, or documentary style, filming because of the shallow focus and overheating issues, never mind the moire and jello.

Do I think DSLRs are game-changing technology? Only sorta. These cameras have been handicapped by the corporation that produces them. Whether intentionally or not, it doesn't matter. Either way, it's the same old corporate routine. Call it the corporate camera cha-cha: One step forward, one step back. What has people intrigued about DSLRs is that the steps forward and back are not the ones we're used to.

With time maybe I'll come around to love these cameras whole-heartedly, but even if that happens I will not argue that DSLRs have "democratized" filmmaking in any meaningful way:

First, as I think I've demonstrated, at their current price point these cameras aren't that much cheaper than other things on the market. When we talk about "democratized technology" we must be talking, on one level, about cost. And on this score, they do not pass the test. (The T2i makes a somewhat better case, but it's also the most handicapped of the bunch.)

Secondly, DSLRs -- as they are currently designed -- actually require more know-how to use effectively than other cameras that can be used for filmmaking. In this sense, DSLRs are actually less "democratic" than other existing movie-making technologies.

Finally, even if -- especially if -- I allow that these DSLRs are getting more people to make movies, let me address a bigger point:

"Democratized" technology serves little purpose if it isn't being used in the service of stories that otherwise couldn't be told. Otherwise, what's the point of democratizing it?

Put another way, if you have the means to make a movie, and you only use that technology (not to mention your time and talent) to make another frigging zombie movie, well, pardon me for not caring. If the storytelling is out of focus, who cares how beautiful the bokeh is?

DSLRs, Democratic Technology and The Cost of Bokeh: Part 1

DSLR filmmaking has been much ballyhooed in the last year or so. Cameras like the Canon 5D Mark II and Canon 7D have been hailed as the lastest in a long line of "democratizing" motion picture technology -- inexpensive cameras that produce cinematic, shallow depth of field images that seem to rival the look produced by cameras costing many times more. There were two reasons I was didn't jump on the DSLR filmmaking bandwagon from the start. For one thing, in the last year I have been working on a lot of other projects, none of which involved needing to worry about how to use a new camera (finishing up a documentary and two DVD releases, raising money for a feature, and writing a script). Another reason was, frankly, I was skeptical. I saw photos of filmmakers dressing the cameras like this:

Going "indie" with a DSLR.

If that's what you had to do to get it to work, I wasn't interested.

As I mentioned in my previous post, though, I did recently decide to experiment with these cameras. And my uninformed skepticism has developed into experience-grounded ambivalence.

After a few months of wrestling with the cameras (especially the Canon 7D), I find them as frustrating as they are inspiring. Yes, I love the way they handle light. I love the lens interchangeability. I love their form factor, (at least initially).

But, as has been well documented elsewhere, these cameras have serious issues. Focus can be a challenge with their small LCDs. They're prone to the "jello" effect. They shoot on a codec that is a challenge to edit and even more challenging to color grade. And, most frustratingly, they have major issues with aliasing, particularly moire, which is often not even observable while shooting.

Sure, I've had busted takes with other cameras -- under-exposed shots on film that didn't come out, shots that were a little soft in HD, or whatever. But DSLRs are built (or not built) for movie-making in such a way that you can very conceivably shoot for a significant period of time only to later discover that all of your footage is unusable. Not "disappointing" -- unusable. Or perhaps you find something like this acceptable. (Note: I did not shoot this.)

To put it bluntly, these cameras have more red flags than a month's worth of World Cup games. They carry a lot of risk for any serious project.

Because there are some undeniably awesome uses for these cameras, though, I have educated myself -- by reading, by watching, by shooting -- to find ways of working around their many, many problems. And I've learned to produce some nice footage.

But many of the techniques I've used to mitigate the problems involve spending more money, making the cameras bigger, and so on.

Fixing the problems often means taking away the very properties that make these DSLR cameras so seductive for filmmaking in the first place.

So in this post and the next I want to deal honestly with the basic costs of DSLR filmmaking and to consider whether these costs are worth the benefits.

It's possible some DSLR acolytes will disagree with, or even have their feathers ruffled, by my writings about this technology.

That's fine. These are my opinions alone and no camera is right for every person, at every time, for every project. But I think that by now this blog has established my credentials as a champion of smaller, less expensive, and simpler technology for movie-making. If I'm being critical, it's probably for good reason.

So, today's post will begin to consider the "cost of bokeh", since their shallow depth of field is often touted as the leading reason for using these cameras.

My next post will finish pricing out the camera and accessories. I'll also offer some thoughts on the notion of this technology as a "democratizing" force.

But enough prelude. What do we need to shoot motion pictures effectively with a DSLR?

Let's start by going with a Canon 7D since it sits in the middle of Canon's DSLR line, with the T2i at the bottom and the 5D Mark II and 1D Mark IV at the top. The 7D averages around $1700. That sounds like a bargain when you put it next to a traditional prosumer camcorder like the Sony EX-1R ($6300) or the Panasonic HPX170 ($3995).

(By the way, if you want to consider the costs with a 5D Mark II, which has an even larger sensor, add about $800 to our totals.)

Then you need a lens. If you want to want to get that shallow DoF then you need a lens that opens wide. And since many people have had good experiences using Canon's Image Stabilized lenses, which seem to reduce some of the jello effect, we'll go with Canon’s 17-55 IS f/2.8 lens. It's been well reviewed and costs about $1100.

Since we're trying to do this inexpensively, we're only going to use one lens. If you want to take advantage of the Canon's interchangeability (with, say, a cool Tokina 11-16MM), those are additional costs.

Some DIY filmmakers looking to get by on the cheap blanch at paying $1100 for a lens, but that's nothing compared to a cine lens. In fact, just because you spent $1100 on that 17-55 f/2.8 doesn't mean it'll necessarily look sharp on the big screen. Shane Hurlbut, ASC argues that the only lenses Canon makes that are sharp enough for big screen work are their L-series primes. (Expect to pay $1300 or so for each prime and only the longer range lenses have Image Stabilization.) But we're going to trust others' reviews of the 17-55, which say it's one of the sharpest lenses Canon makes.

(As a side note, you could go with Nikon AI-series still lenses. They're both cheaper and are said to be sharper. But in my experience, you'll need to buy a good Fotodiox Pro adapter [$70 each] to use them effectively. Plus, when you want to use your Canon DSLR as a stills camera, you'll have no autofocus or auto exposure control, so I'm leaving them out of the conversation for now.)

We're doing good so far, but sound, as they say, is half the picture.

While, technically speaking, one may record sound with the Canon, its sound capabilities are far from what you'd get with a prosumer camcorder (e.g., no XLR inputs, no level control, etc.). There is lots of work on Vimeo featuring beautiful shallow-focus images of flowers and so on, much of it set to cool music. But if you want to make movies, you know, where people talk and stuff, you've got to upgrade your sound.

I'm not going to count the cost of XLR cables, microphones, etc. since you would need that stuff with a traditional camcorder. Instead, we'll just look at adding an adequate sound recording device. A lot of people using the Canon for DSLR cinema use the Zoom H4n recorder. It's about $280. (If I were buying, I'd spend the extra $250 and get the Marantz PMD661 because it's easier to use. But that's just me.) An alternative is to use something like a Beachtek or JuicedLink adapter, but I don't like the idea of all my location sound hinging on a single mini plug going into something that was primarily designed as a stills camera.

With the Zoom recorder (or similar) remember, you're shooting double system. As such, you'll need to slate your shots and spend lots of time in post syncing up your slates. (Or, if you don't, reading peoples' lips.) A time-saving solution is PluralEyes, which syncs your double system footage for you. Your time is worth something; PluralEyes has valued it at $150.

What's the tally so far? $3230.

Oh. But we're ready to make movies, right?

Yes and no. We may have picture and sound, but it may not be useable yet. But we'll save that discussion for the next post.

My Two Favorite Resources on DSLR Filmmaking

My absence for the past few months has been due to the fact that I've been woodshedding, as folks in the Jazz world would say. One of the things I've been doing is writing. When I'm writing, I find this blog takes a back seat. Sorry, dear readers. That's the way it goes. As for what I've been writing, well, maybe one day you'll see…

In my spare time, though, I've spent a lot of time playing with these newfangled DSLR cameras. Though I've bought one (a Canon 7D), I'm not sold on them. I know I'm late to the party in discussing them, but better late than never. I'll post my thoughts in a few days.

In the meantime, there have been several resources for DSLR filmmaking that, time and time again, I've consulted as I've been experimenting with these cameras. I want to give a special shout out to two of them:

The first is Ryan Koo's fantastic DSLR Cinematography Guide. I always enjoyed Ryan's writings on the now-defunct DVGuru blog, and this reminded me of that. Ryan has done the legwork for novices, compiling information from all over the 'net. If you are new to DSLR filmmaking and have time to read only one thing, read this. It's free, but if you send him a donation you'll get a PDF of the whole thing. I did.

The second resource is Shane Hurlbut, ASC's invaluable blog. I knew Hurlbut was a champion of the Canon DSLR cameras since at least last summer. What I didn't know until recently, though, was how generous of blogger this guy is. How does a guy in the ASC have time to write as much as he does while I'm making my first post in, what, three months?

Both Ryan's and Shane's willingness to share their knowledge and mistakes so freely (as in "openly" and as in "without compensation") has rekindled my love of internet.

But for now, it's back to the writing room.

By the way, for more on woodshedding, check this out.

Cinematography for Improvisation: Post-Panel Links

The Cinematography for Improvisation panel that I moderated was a blast -- and, while I felt like it was a success, the one hour we had to dig in flew by. I personally could have listened to Andrew Reed, Allison Bohl, and Justin Molotnikov talk shop for another couple of hours. There were easily 100 people in the crowd on a Monday afternoon and the feedback after the panel was very positive. Here are the links, as promised:

Justin Molotnikov


Crying With Laughter -- Justin showed clips from this film, which had its North American Premiere at SXSW.

Synchronicity Films is Claire Mundell and Justin Molotnikov's production company. For those of you that attended the panel, Claire sat near the front of the room and shared some thoughts from the audience.

Finally, the improv film webisodes from the Wickerman Music festival that Justin briefly mentioned can be found at www.wickerman.tv.

Allison Bohl

"Blessed Be, Honey Bee" -- This is the music video that we saw behind-the-scenes stills for, but which we didn't have a chance to screen during the panel. Allison directed and shot this video.

Allison's reel is also on Vimeo. The reel features, among other things, selected shots/scenes from "People of Earth" the feature that Allison showed a clip from on the panel.

I Always Do My Collars First - website for Allison's first documentary

Andrew Reed

Quiet City -- Andrew showed a clip from this film, which had its World Premiere at SXSW in 2007.

Cold Weather is the new film by Aaron Katz, shot by Andrew Reed. The trailer can be found here.

Paul Harrill (moderator)

Obviously, if you are here, you have found my blog. Information about my own work as a filmmaker can be found here.

Cinematography for Improvisation - SXSW 2010 Panel

If you've not heard already, I'm happy to announce that the panel that I proposed for South by Southwest 2010, Cinematography for Improvisation -- Lighting the Unknown, was selected. Thanks to everyone who voted in support of the idea via SXSW's PanelPicker!

Though this will be my third SXSW as a panelist/moderator, this was the first time that I've ever proposed a panel. Selecting the panelists was a collaboration between me and the SXSW organizers, especially Jarod Neece. I'm very excited about the people we've got on board to tackle the subject. If you're at SXSW, check out the panel on Monday, March 15 @ 2pm.

Panelists/bios:

Allison Bohl Allison Bohl makes movies with a natural look and creative touch. With experience in documentaries, experimental films, and features, she has become known for capturing beautiful images with minimal equipment. She is based in South Louisiana, but has worked internationally.

Andrew Reed Andrew Reed is the cinematographer of the feature films Cold Water (SXSW '10) and Quiet City (SXSW '07), both written and directed by Aaron Katz.

Justin Molotnikov Justin Molotnikov is the writer/director of the feature film Crying With Laughter (SXSW '10).

Here are some clips of their work:

Tape is dead! Long live tape!

It struck me today that For Memories' Sake will probably be the last movie I'm involved with that uses videotape. Ashley began shooting the documentary with the venerable DVX-100 in 2006 and, for consistency's sake, we stuck with that camera through production. All the new projects that I have on the horizon will be shot with a tapeless cinema camera, whether it's made by Panasonic, Sony, or Red. So tape is dead to me. Or is it?

One of the issues, of course, about shooting tapeless formats is what you do with the data. While editing with tapeless footage, of course, I keep lots of backups on drives in different locations. But after the project is completed, using hard drives to archive the footage is not a reliable solution. Of course, I'll confess that this is what I've done in the past. But as my hard drives age, and as I amass more footage that I'll want to hang onto, I know I need to find another solution. Most pros will tell you that solution is (wait for it).... tape. Specifically, LTO or "Linear Tape Open."

Luckily, for us Mac users out there, Helmut Kobler recently did us all a service by summarizing how to get started with LTO4 tape archiving on a Mac. Kobler estimates the low-end price tag for a Mac-compatible LTO system as $3300.

That figure may seem like a lot to independent filmmakers. (I wonder how many fewer Panasonic HVX200s or Sony EX-1s would have been sold if this cost was factored into the purchase price?)

In the end, whether to spend this kind of money amounts to questions about risk and value: How much do you value your data? And how much risk are you willing to take that your data might be lost forever?

For me, that $3300 is starting to look like a decent value. Long live tape!

Take the Survey: 50 States, 50 Filmmakers

I've been looking over Ted Hope's blog lately and one thing he keeps returning to is the idea that in order for cinema to be truly free (i.e., liberated), we have to do our part to help film culture. I agree.

That's part of what this blog has always been about. One of the reasons I began this blog was to champion filmmakers working regionally.

But now I'd like to undertake a concrete project specifically dedicated to spotlighting filmmakers that live around the country. To do that I need your help. Not a lot of help, mind you -- just a few minutes.

I'm calling this undertaking 50 States, 50 Filmmakers.

It will probably end up being a series of discussions with filmmakers working around the country. I hope to talk with others about why they live and work where they do, the challenges and opportunities they face, the resources available to them, and how they support their work. Ideally, these discussions will include links that allow you to watch or purchase their work. And I'd like to do one for each state, in case the title didn't tip you off.

So, to restate, to do this project completely, I need your help.

I want you to tell me who you think is living and making interesting films outside of New York or Los Angeles. The films can be feature films, documentaries, or short experimental works. I don't care. "Interesting" and "not-New-York-or-Los-Angeles" is all I care about.

If you want to nominate a filmmaking team or filmmaking collective, that's cool. I'm open to doing a few historical surveys, too, so if you prefer to nominate someone deceased (say, Eagle Pennell of Texas or Colorado's Stan Brakhage), go for it. I just want some interesting ideas.

So, without further ado, CLICK HERE TO TAKE THE SURVEY.

Don't know 50 filmmakers in 50 states? That's okay. I don't either. That's why I'm doing the survey -- to fill in some blanks and to get some good ideas for this thing. Just take the survey and give suggestions where you can. You don't have to provide nominations for all 50 states.

And please pass this along to your friends. I'd like as many people throwing out ideas as possible. I'm going to leave this post up for a couple of weeks, after which I'll start compiling replies.

Again, here's the link to the survey.

Congrats to Rooftop Films Filmmakers' Fund Recipients

Rooftop Films today announced the four recipients of their 2009 Filmmakers' Fund Short Film Grants. It gives me a lot of pleasure to spread the word about this because, in addition to being someone whose career benefitted greatly from a short film grant, I happen know two of the recipients. Recipients and summaries of the projects:

ROOFTOP FILMS AND THE CHICKEN & EGG FUND SHORT FILM GRANT + Sara Zia Ebrahimi: Norman Schwartzkopf Made Me Gay

ROOFTOP FILMMAKERS’ FUND SHORT FILM GRANTS Underwritten by Cinereach

+ Moon Molson: Crazy Beats Strong Every Time

+ James M. Johnston: Knife

+ Dustin Guy Defa: We Have No Home

Way to go Sara Zia and James -- and congrats to all!

More details about the grants and the projects selected for funding here.

Vote for my panel at SXSW...

As you may have heard, South by Southwest is crowdsourcing their panel ideas (at least in part) for 2010. I've proposed a panel and I'd love to have your vote of support to make the panel happen. Click HERE, create an account (takes just a sec), and vote thumbs up.

The panel I've proposed is called Cinematography for Improvised Films: Lighting the Unknown.

Here's a description:

This workshop focuses on the unique challenges of shooting improvised cinema. How can a cinematographer approach working with little or no script, actors that need to be able to move freely without worrying about "hitting their light", and live locations that can't be controlled? The cinematographers of a few distinguished, beautifully shot micro-budget indies discuss clips and share their secrets for creating a distinctive look on the fly.

I would be the panel's moderator (organizing it and asking the questions). I've got some great ideas for who would be on the panel, but I have to stay mum on that for now.

You don't have to be planning to attend SXSW to support the panel since panels are recorded and blogged about. If the topic is interesting, vote for it.

pCAM for iPhone

David Eubank's pCAM and pCINE were great applications for the Palm OS. They helped you compute depth of field, hyperfocal distance, angle of view.... Together, they were like a computerized version of all those charts in the American Cinematographer's Manual that you always referred to on set. Now, Eubank has outdone himself with pCAM for iPhone, which combines the pCAM and pCINE applications in a new interface. If you have an iPhone and you shoot film or video, this is a supremely useful tool. At $39.99 it may seem pricey for an iPhone app, but in my opinion it's well worth the price.

pCAM for iPhone [iTunes store link]